Image to Video AI: How to Turn One Photo Into a Moving Video
How image to video AI works and how to use it: upload a still, describe the motion, set first and last frames, and generate a short video in Vibbit.
Turning a photo into a video with image to video AI takes three steps: upload a still image, describe how the camera moves and what changes, then generate a short clip you can post. In Vibbit, it lives in Create → Video. You can start from one image, two images (first and last frame), or images plus audio.
How does image to video AI work?
The model uses your image as the visual anchor, then works out the motion from your prompt and fills in the frames in between.
The big difference from text to video is that you decide the subject, not the model. Start from a product photo or a scene image from your Amazon listing, and the subject, colors and composition stay close to the original. The model's job is to make it move.
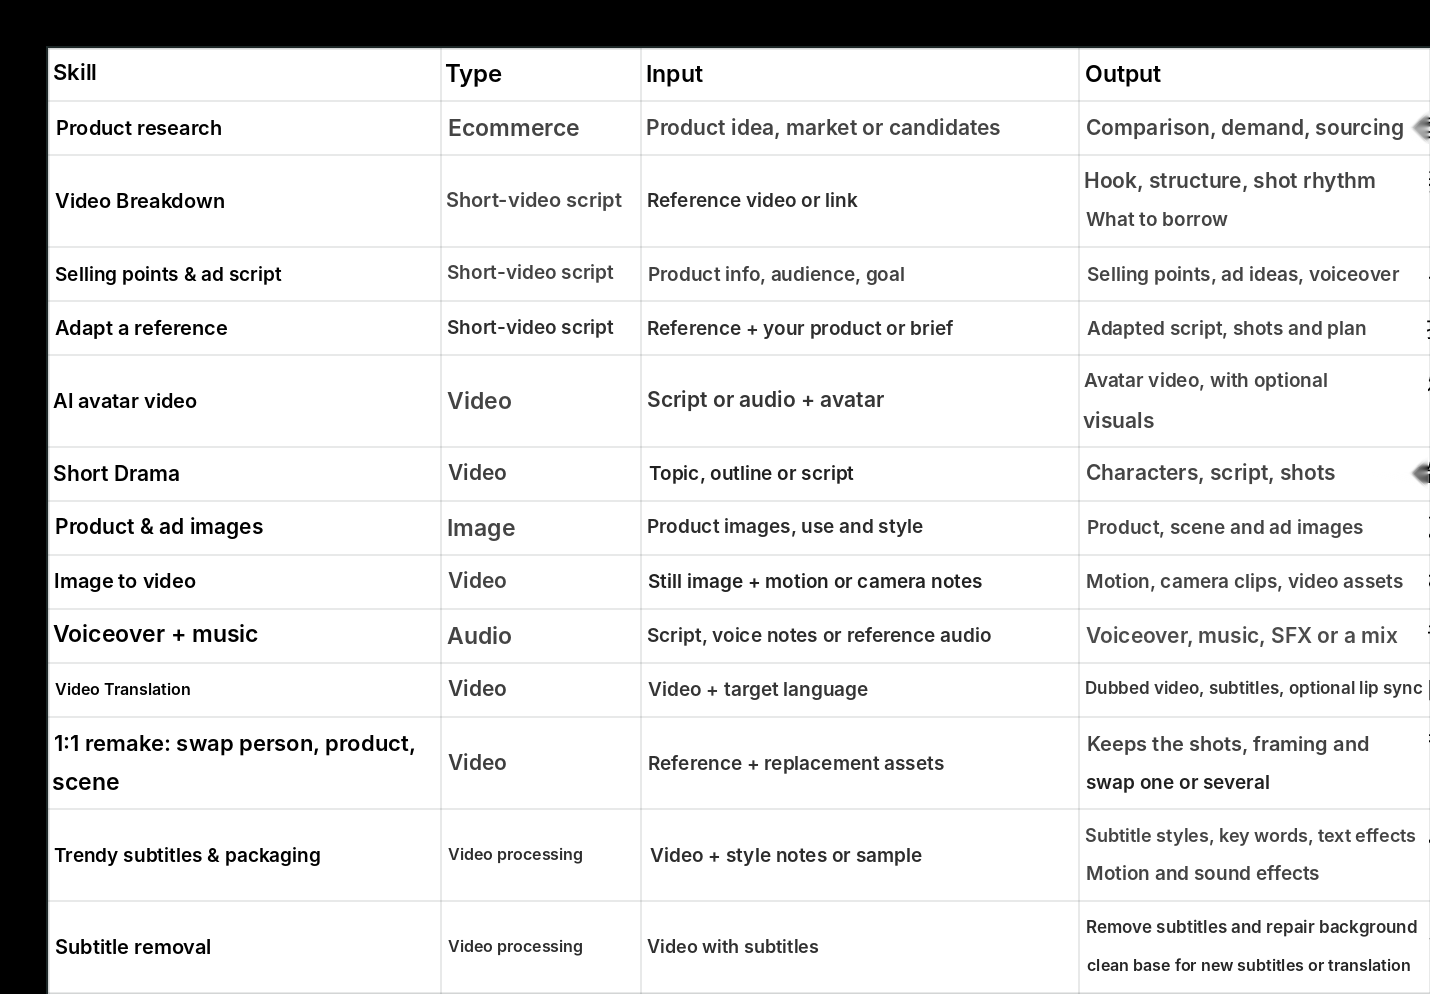
So in Vibbit, the input is a still image plus motion or camera notes. The output is motion shots, camera moves and reusable video clips.
How to turn an image into a video in Vibbit
Three steps: pick a model, upload the image, write the prompt. It all happens in one input box on the Create page.
Step 1: Pick a model
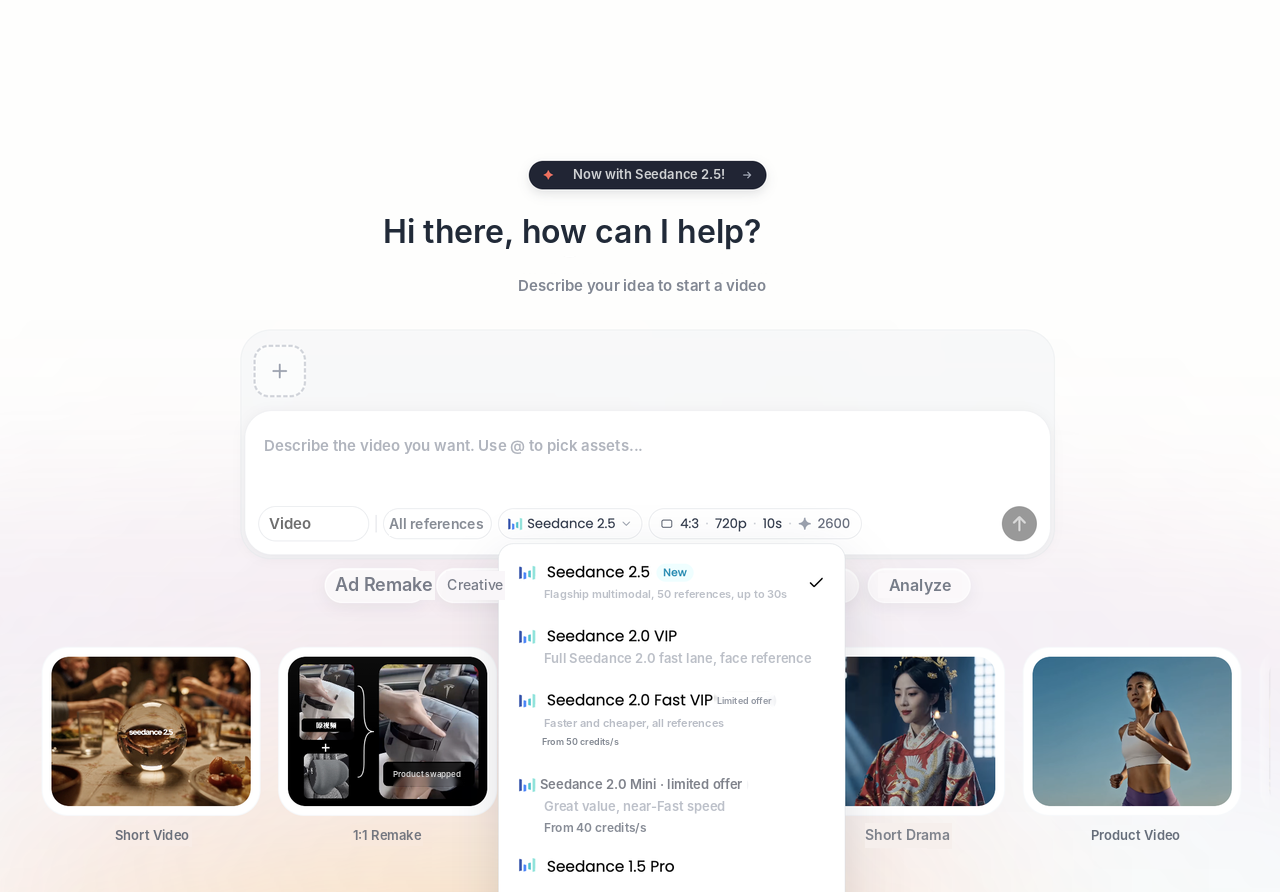
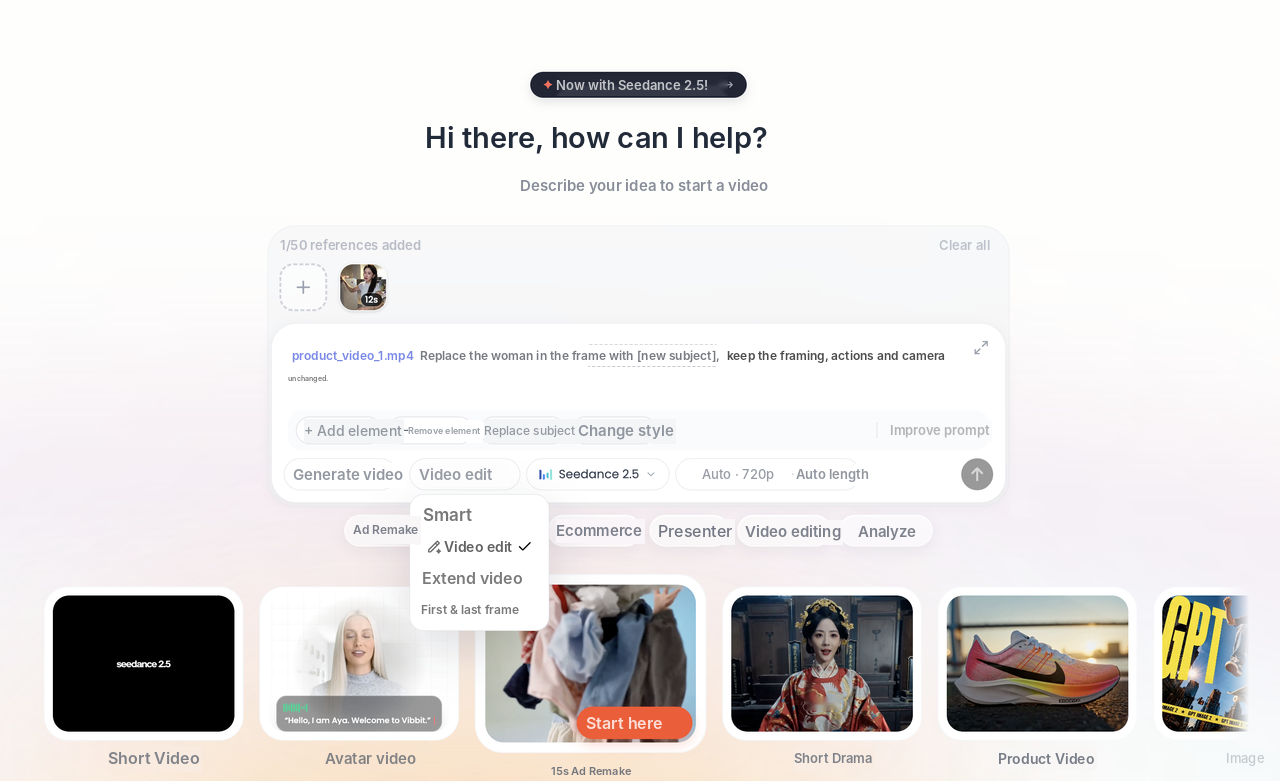
On the Create page, switch the mode to Video and choose a model from the dropdown. Vibbit offers several video models, from flagship models for the best quality to faster, lower-cost ones for quick drafts. The settings bar shows the aspect ratio, resolution, length and estimated credits before you submit.
My rule of thumb: use the top model for final shots, and a fast one when you want to try lots of variations.
Step 2: Upload your image
Click + next to the input box, or pick from your library. You have two options:
- One image: the model uses it as the starting frame and decides what happens next.
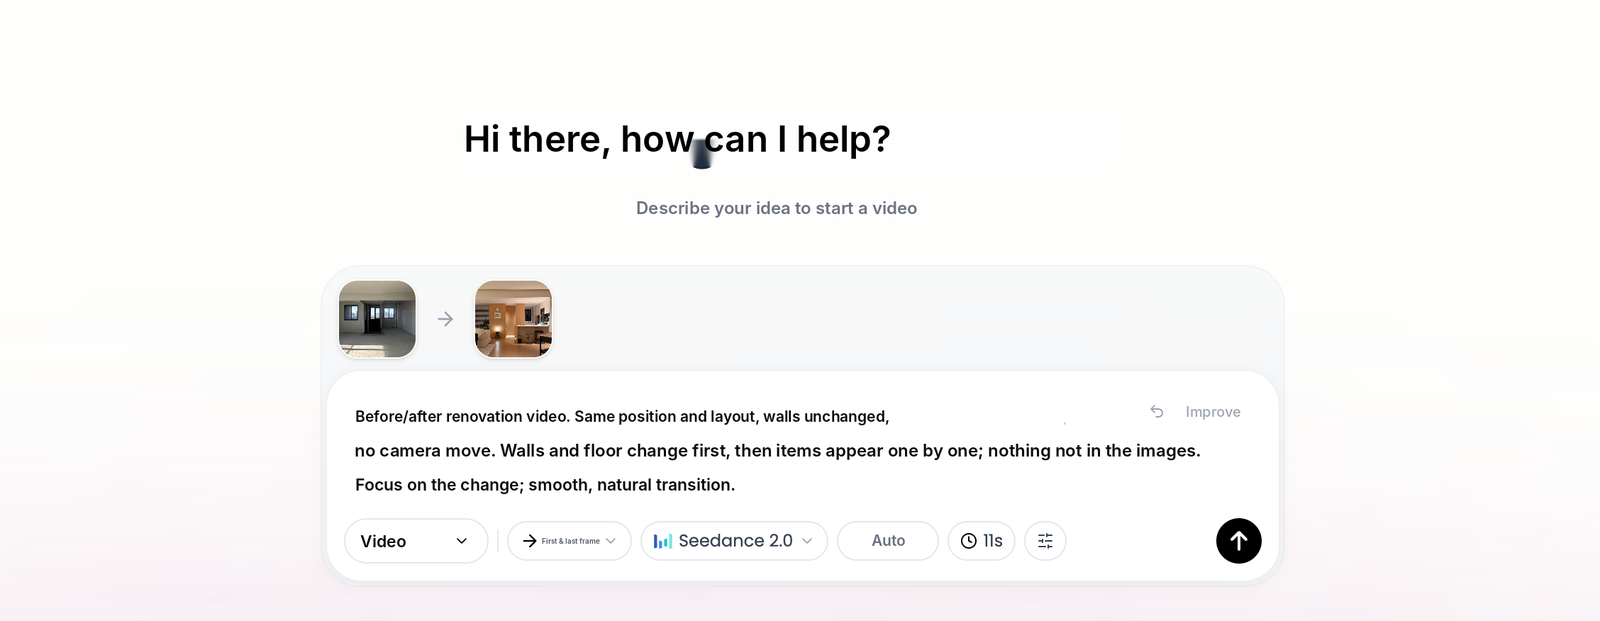
- Two images (first and last frame): one is the first frame, one is the last, and the model fills in the change between them.
I use the second option a lot. For example, upload a photo of a room before renovation and another after. The model works out the in-between: walls changing color, furniture appearing piece by piece.
Step 3: Write the prompt and set the options
The prompt doesn't need to be long, but it should cover three things: how the camera moves, what changes, and what must not change. For example:
Slow push in. The subject stays the same. Light sweeps in slowly from the left. Don't add anything that isn't in the image.
Click Improve and Vibbit rewrites your description in a way the model understands better.
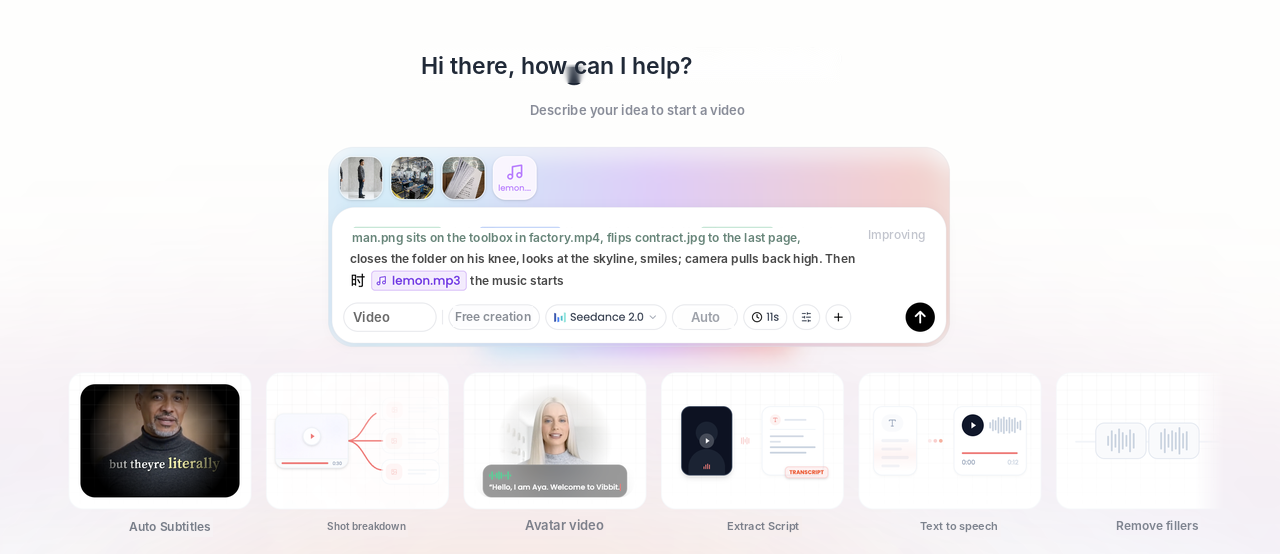
If you also have a voiceover or music, switch to Free creation. You can pass images, video and audio as references together, and use @ to say which asset goes where.
One image vs. two images
It comes down to control. With one image, you set the start and the model picks the end. With two, you set both and the model only fills the gap.
| One image | Two images (first and last frame) | |
|---|---|---|
| You control | First frame | First and last frame |
| Best for | Adding motion, camera moves, atmosphere | Before/after, transformations, fixed start and end |
| Common uses | Product photo to motion, scene to b-roll | Renovations, product before/after, state changes |
| You need | 1 image | 2 images with the same framing and subject |
With two images, keep the camera position and subject placement basically the same. If the framing differs too much, the transition will jump.
Are there image requirements?
Yes, and Vibbit checks them before you generate. It checks size, aspect ratio, format and file size, compresses or resizes images when it can, and warns you right away if one won't work, instead of failing after a long wait.
My three tips:
- The image doesn't need to be huge. A clear subject is enough.
- For first and last frame, use the same camera position and framing.
- Add "don't add anything that isn't in the image" to your prompt. It noticeably cuts down on random extra objects.
What if one clip isn't long enough?
Make it in parts and join them. Keep each generation short. For longer content, use the last frame of one clip as the first frame of the next. The result flows much better than starting each clip from scratch.
Which aspect ratio for TikTok, Reels and Shorts?
Choose it by platform before you generate, not after.
| Where you'll post | Aspect ratio |
|---|---|
| TikTok, Instagram Reels, Facebook Reels, YouTube Shorts | 9:16 |
| Standard YouTube videos | 16:9 |
| Instagram feed posts | 1:1 |
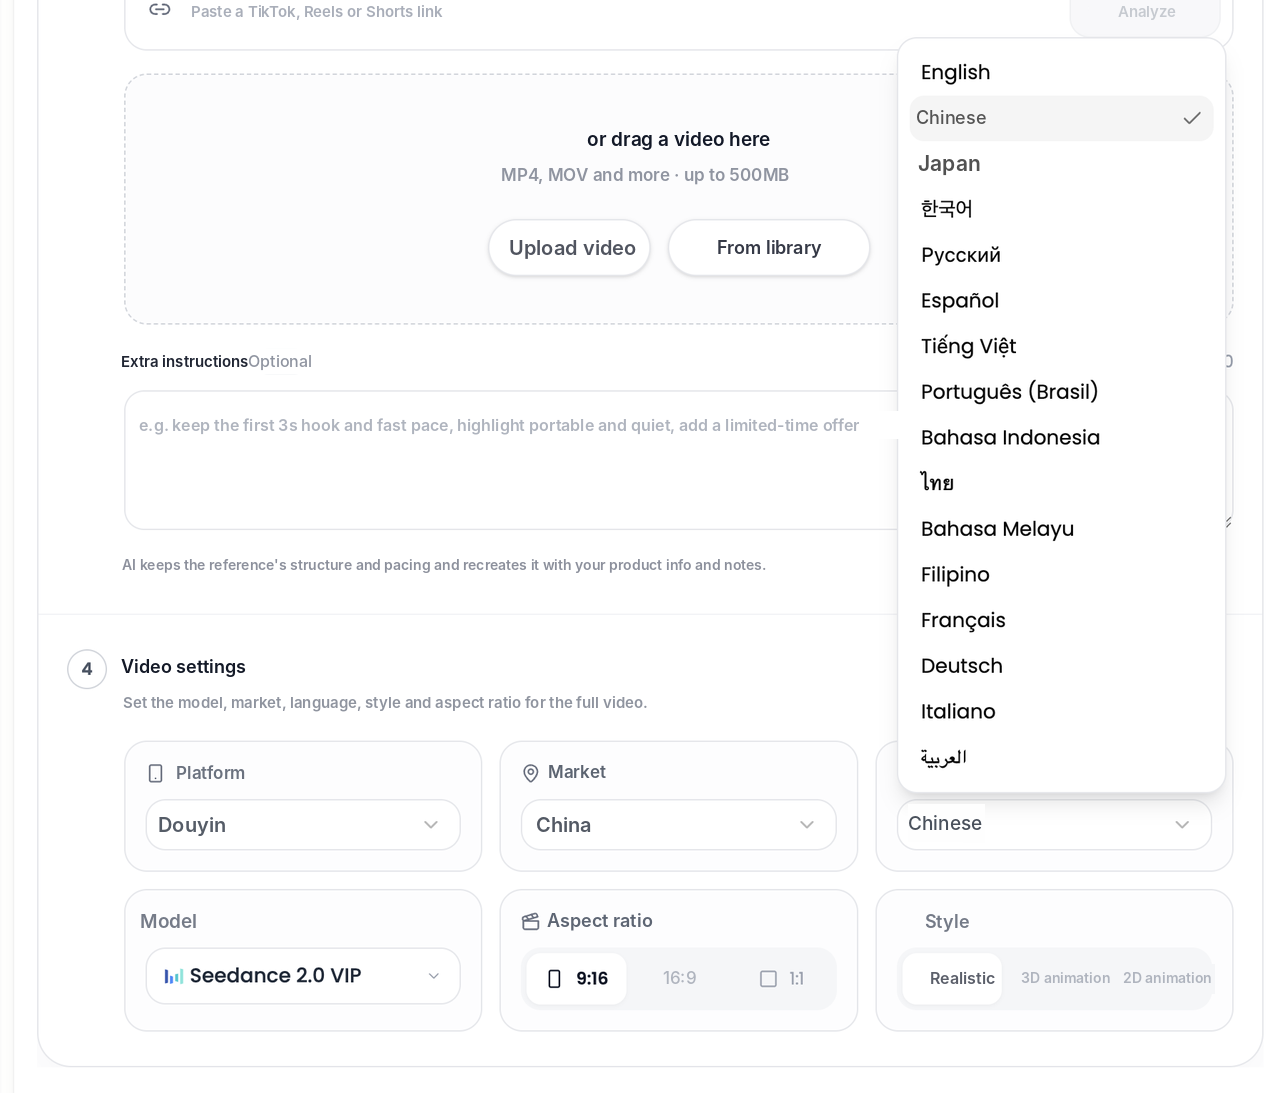
In Vibbit's Video settings you can set the platform, market, language and aspect ratio. When you pick an international market, the default language updates automatically.
FAQ
How long does image to video take?
It depends on the model and length you choose. Fast models return results quicker. You'll see the estimated credits before you submit.
The video added things that weren't in my image. What should I do?
Add "don't add anything that isn't in the image" to your prompt. If it still happens, switch to first and last frame mode. Fixing both ends leaves the model much less room to improvise.
Can I use image to video for ecommerce ads?
Yes. Import your product into Vibbit's product library (for example, from an Amazon link) and use its images to create product shots, scenes and ad videos without uploading them every time.
Do I need complicated prompts?
No. Cover how the camera moves, what changes and what must stay the same. Prompt improvement handles the rest.
Try it
Have a photo you'd like to bring to life? Upload it to Vibbit and get your first image to video clip: vibbit.ai